-
Widgets
Other complex widgets

AI-Assisted Coding with Webix


AI-Assisted development with Webix


Why Webix is AI-production ready
Webix UI components for AI-assisted coding
Quick guide: writing prompts for better AI results
For quick prototyping, evaluation, or getting started, you can keep prompts simple and describe what you want in plain language. For production-ready interfaces, craft clear, detailed prompts. Get the most out of AI-assisted coding by writing structured, detailed prompts.
Here’s how to improve AI workflows with Webix:
- "Generate clean JavaScript code that creates a Task Management System interface."
- "Use Webix UI library and build as a single webix.ui instance."
- "Create a structure with a form on the left, and a list
on the right." - "Place a toolbar on the top row, split view below with sidebar and content area."
- "Create a form with data fields and two buttons:
Save and Clear." - "Create a list for displaying tasks."
- "The form must contain the following fields: Task title (text), Assignee (select), ..."
- "Items in the list must display the fields from the dataset: ..."
- "The Clear button must clear the form and reset selection
in the list." - "Click on a row selects it. Data of the selected row should be loaded into the form for editing."
- "Validate the data before saving: the Assignee must
not be empty." - "Add a new row to the datatable, then clear the form."
AI prompt template: generate UIs with Webix
Context and Technology Stack
- Goal: Create a [e.g., project management dashboard, user registration form, issue reporting tool].
- Technology: Generate a runnable code snippet using modern ES6+ JavaScript and the Webix UI library.
Layout and Components:
- Structure: The main layout should be organized as [a header with a logo, a left sidebar for navigation, and a central viewport for content].
- Key components: The UI must include the following components: [a datatable, a form with inputs, a toolbar with buttons]
- Individual settings: a [datatable] must have [listed columns, their sorting modes, in-column filters, etc.].
Behaviour and interactions:
- Interactions: When a user [clicks a row in the table], the application should [load the row's data into the form for editing].
- Data operations: The ["Save"] button should [validate the form and then update the data in the table].
- Other logic: [A search input should filter the table's data based on a partial match in the "name" and "email" columns].
Styling (optional):
- Specify data templates (for example, in datatable columns): colors, fonts, spacing if needed.
- Define layout types, paddings and margins in UI settings.
From prompt to Webix working app in just 60 seconds


AI coding experiments: 8 LLMs, 16 Code Outputs
We tested AI-assisted coding with Webix across eight of the most advanced models: Grok4, GPT-5, Claude Opus 4.1, Gemini 2.5 Pro, Claude Sonnet 4.5, OpenAI o3, DeepSeek V3.2, Qwen3 Max. Every single one generated working code in seconds. Check out the runnable results below by clicking on the card.
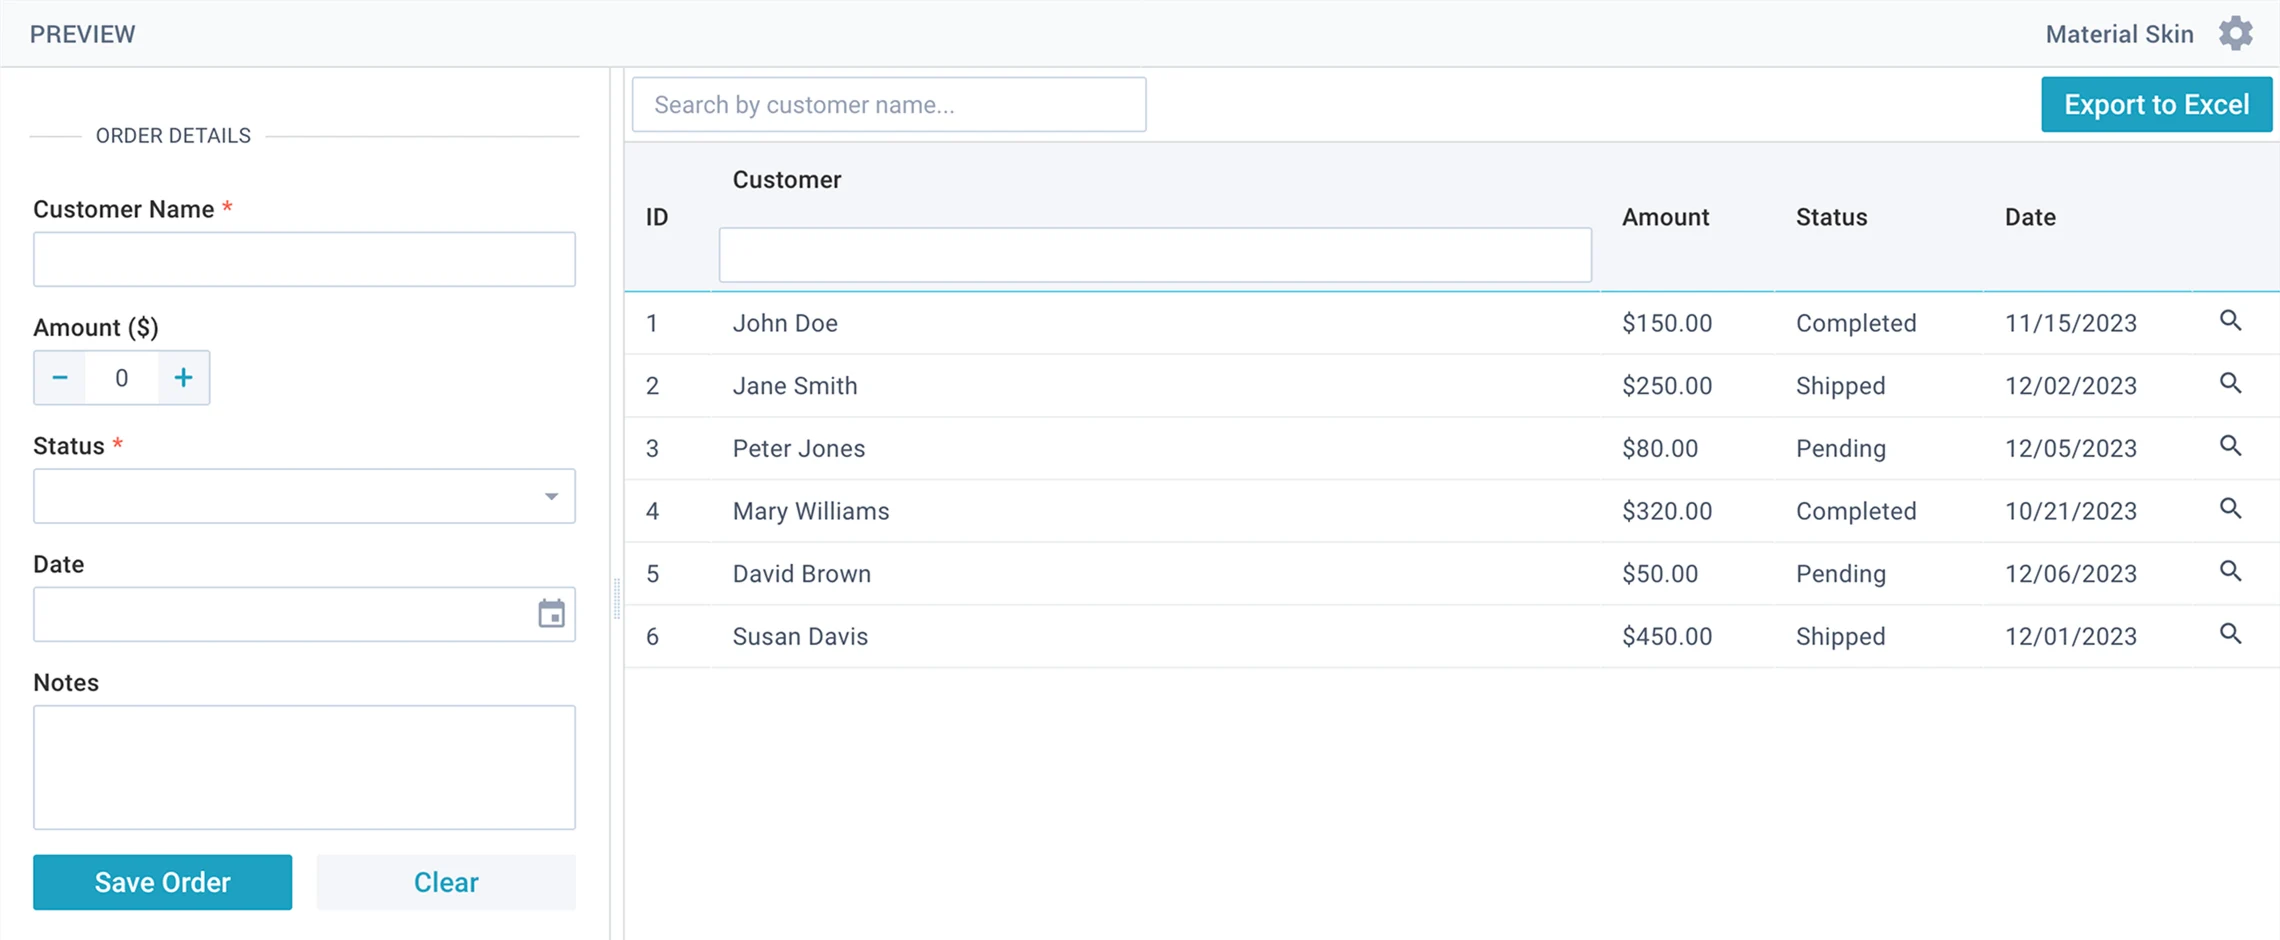
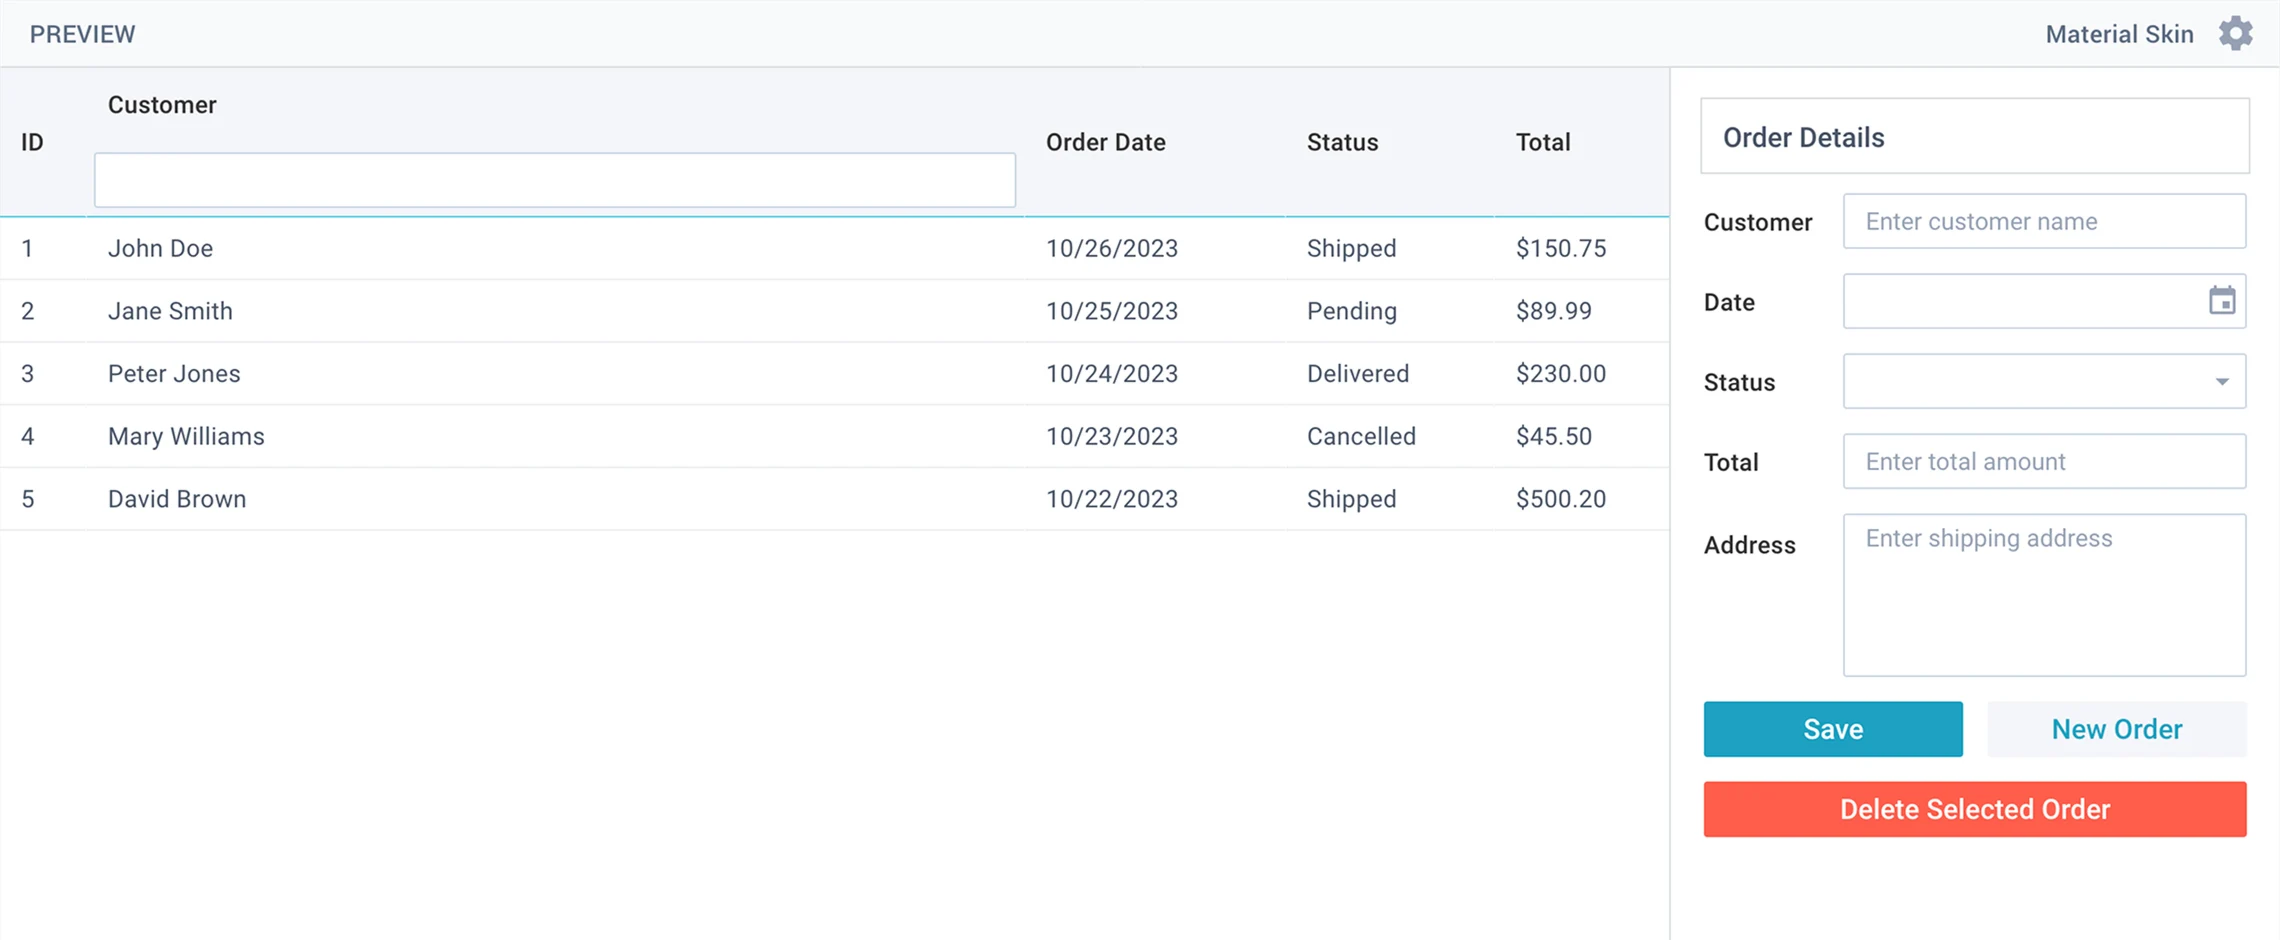
Use Webix to create an order management system with a table and form.
Generate clean JavaScript code that creates an Order Management System interface.
Use modern ES6 syntax and format the code neatly as if formatted by Prettier.
The entire interface must be defined within a single `webix.ui({})` call and include the following parts:
1. Layout
Create a structure with a toolbar at the top, a form on the left, and a datatable on the right.
2. Toolbar
Include a text input for searching orders (filters the datatable by customer name) and a button labeled "Export to Excel" that exports datatable content to Excel.
3. Left Side (Form)
Create a form containing: Customer (text), Amount (numeric), Status (select with options Pending, Shipped, Completed), Date (datepicker), and Notes (textarea).
Below the fields, add Save and Clear buttons. The form must validate that Amount if bigger than 0 and Status is required when the Save button is clicked.
If form is valid, check if a row is selected: if yes, update the selected row with form data, if not - add a new row to the datatable. Then clear the form.
4. Right Side (Datatable)
Create a datatable with columns: ID, Customer, Amount, Status, and Date.
The Status column should display colored badges: Pending (yellow), Shipped (blue), Completed (green).
Selecting a row loads its data into the form for editing.
See Gemini 2.5 generate Webix interfaces
Even a simple prompt produced fully working code. A detailed prompt specifying layout, fields, interactions, status badges, and export features generated the interface exactly as intended. Clear and specific prompts help AI assistants create UIs faster and more precisely.